You’ve likely heard that changing your car’s oil is a vital maintenance task, but you may be hesitant to tackle it yourself. However, with the right knowledge and tools, you can easily perform this essential service at home. By following a step-by-step process, you’ll not only save money but also gain a better understanding of your vehicle’s needs. Whether you’re a novice or an experienced DIYer, mastering the art of oil changes can empower you to take control of your car’s maintenance. Let’s investigate the ten easy steps that will guide you through this process and help you keep your engine running smoothly.
Key Takeaways
- Gather necessary tools including a wrench, oil filter, funnel, and new oil before starting the process.
- Park your car on a level surface, engage the parking brake, and let the engine cool down.
- Locate and remove the oil drain plug to drain old oil, then replace the plug securely.
- Remove the old oil filter and install a new one, ensuring proper sealing.
- Add the correct amount and type of new oil, then check the level with the dipstick.
Table of Contents
Gather Necessary Tools and Materials
Five essential tools you’ll need for an oil change are a ratchet and socket set, oil filter wrench, oil catch pan, funnel, and safety equipment.
The ratchet and socket set is vital for removing the oil drain plug and any undertrays that may be blocking access to the oil pan. An oil filter wrench is indispensable for loosening the old filter, which can be stubbornly tight due to heat and pressure.
The oil catch pan is a must-have for collecting the old oil as it drains from your engine. This prevents messy spills and guarantees proper disposal of used oil.
A funnel will help you pour new oil into the engine without spilling, making the process cleaner and more efficient.
Don’t forget safety equipment like gloves and safety glasses to protect yourself from hot oil, dirt, and debris during the oil change.
Park and Secure Your Vehicle
To begin the oil change process, you’ll need to park your vehicle on a level, stable surface and engage the parking brake. This guarantees your safety and prevents the car from rolling during maintenance. If you’re working on a slight incline, position your vehicle so that the front is facing uphill.
For added stability, especially when lifting the vehicle, place wooden blocks behind the rear wheels. If your car sits low to the ground, you may need to use ramps or jack stands to raise the front end. Always confirm these are securely positioned before working underneath the vehicle.
Here’s a quick reference guide for parking and securing your vehicle:
| Step | Action | Purpose |
|---|---|---|
| 1 | Park on flat surface | Stability |
| 2 | Engage parking brake | Prevent rolling |
| 3 | Block rear wheels | Extra security |
| 4 | Use ramps/jack stands | Access undercarriage |
| 5 | Remove oil dipstick | Facilitate drainage |
Before proceeding with the oil change, remove the engine oil dipstick. This simple step helps the old oil drain more efficiently, guaranteeing a more complete oil change. With your vehicle properly parked and secured, you’re now ready to begin the actual oil change process.
Locate Oil Drain Plug
After securing your vehicle, you’ll need to locate the oil drain plug underneath the car. This vital component is typically situated at the bottom of the oil pan, which is found at the rear of the engine oil sump. To pinpoint its exact position, consult your vehicle’s owner’s manual, as the location can vary depending on your car’s make and model.
The oil drain plug is usually a hex-shaped bolt that requires a socket wrench or ratchet for removal. Before you attempt to locate it, make certain your vehicle is parked on a level surface and the engine has cooled completely to prevent burns.
Once you’ve identified the drain plug, position your oil catch pan directly beneath it to collect the old oil as it drains out. When you’re ready to remove the plug, use the appropriate tool to loosen it carefully. Be prepared for oil to start flowing immediately once the plug is removed.
Keep the drain plug and its washer in a safe place, as you’ll need to reinstall them after the oil has fully drained.
Drain Old Oil
Now that you’ve located the oil drain plug, it’s time to drain the old oil from your vehicle’s engine. Begin by positioning an oil catch pan directly beneath the drain plug to collect the used oil. Before proceeding, remove the oil fill cap from the engine to allow air flow, which will facilitate a complete drainage.
Using a socket wrench, carefully loosen the drain plug by turning it counterclockwise. Hold it securely as you remove it to prevent any accidental spills. Once removed, allow the old oil to drain completely into the catch pan. This process may take several minutes, so be patient to guarantee all the oil is expelled.
While waiting, inspect the drain plug for any signs of damage or wear. If it’s in good condition, prepare to replace the drain plug once the oil has finished draining. When the flow of oil has stopped, carefully reinsert the drain plug and tighten it to the manufacturer’s specifications. This step is essential to prevent leaks and guarantee proper sealing.
Remember to dispose of the old oil responsibly at a certified recycling center or auto parts store.
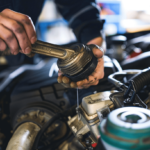
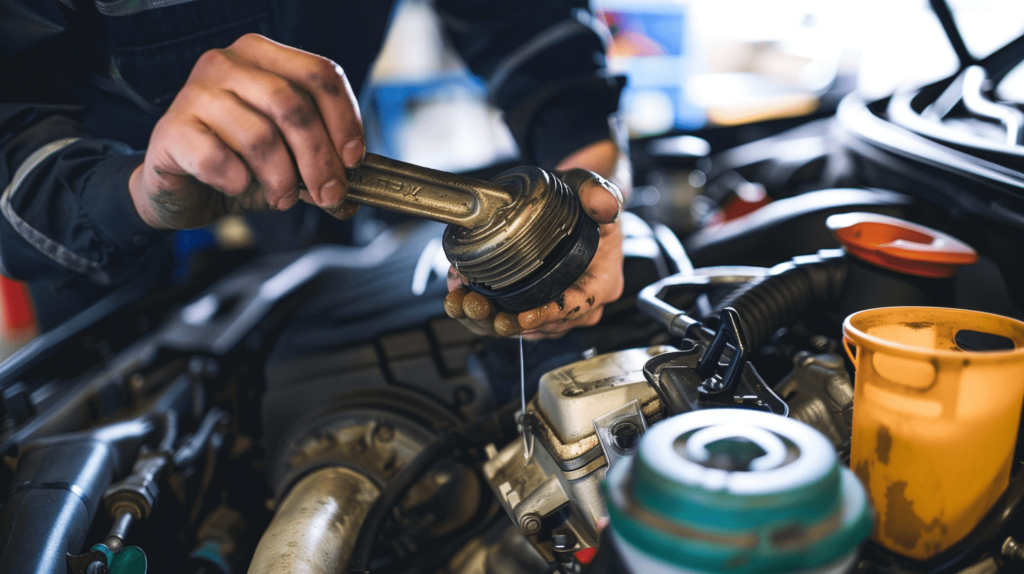
Replace Oil Filter
Replacing the oil filter is an essential step in the oil change process that guarantees your engine’s longevity and performance.
To begin, locate the oil filter on your engine, typically found on the side or bottom. If you’re uncertain, consult your owner’s manual for its exact position. Before removing the old filter, place an oil catch pan underneath to collect any residual oil that may spill.
Use an oil filter wrench to loosen and unscrew the old filter counterclockwise. Be cautious, as it may still contain old oil. Once removed, check that the rubber gasket isn’t stuck to the engine, as this can cause leaks when installing the new filter.
Take the new filter and apply a thin layer of fresh oil to its rubber gasket. This guarantees a proper seal and makes future removal easier.
Install the new filter by hand, screwing it on clockwise until it’s snug. Don’t over-tighten, as this can damage the filter or make it difficult to remove later.
Once properly installed, you’ve successfully replaced your car’s oil filter, contributing to a cleaner and more efficient engine operation.
Clean Drain Plug Area
Before removing the drain plug, it’s vital to thoroughly clean the surrounding area to prevent contaminants from entering the oil pan. Use a clean rag to wipe away any dirt, grime, or debris that may have accumulated around the drain plug. If you encounter stubborn buildup or rust, employ a wire brush or an appropriate cleaning solution to guarantee a pristine surface.
Inspect the drain plug closely for any signs of damage, such as cracks or excessive wear. These issues could lead to oil leaks after you’ve completed the oil change. If you notice any problems, replace the drain plug before proceeding.
Position your oil catch pan directly beneath the drain plug to collect any residual oil that may spill during removal. This step is vital for maintaining a clean work area and preventing environmental contamination.
Once you’ve drained the old oil, take a moment to wipe the drain plug and its surrounding area again. This final cleaning step guarantees a secure and leak-free fit when you reinstall the plug.
Reinstall Drain Plug
Once you’ve drained the old oil and cleaned the area, it’s important to properly reinstall the drain plug to prevent leaks and guarantee a secure seal.
Begin by inspecting the drain plug for any signs of damage or wear. If it’s in good condition, apply a small amount of new oil to the rubber O-ring. This lubrication guarantees a proper seal and helps prevent leaks.
To reinstall the drain plug:
- Start threading by hand to avoid cross-threading.
- Use a socket wrench to tighten to the manufacturer-specified torque.
- Double-check that it’s securely tightened before adding new oil.
It’s critical to strike the right balance when tightening the drain plug. While it needs to be securely tightened to prevent leaks, over-tightening can damage the oil pan threads.
Always refer to your vehicle’s manual for the correct torque specifications.
Before proceeding to the next step, take a moment to verify that the drain plug is properly installed. This final check is essential to prevent any potential leaks when you start the engine.
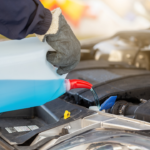
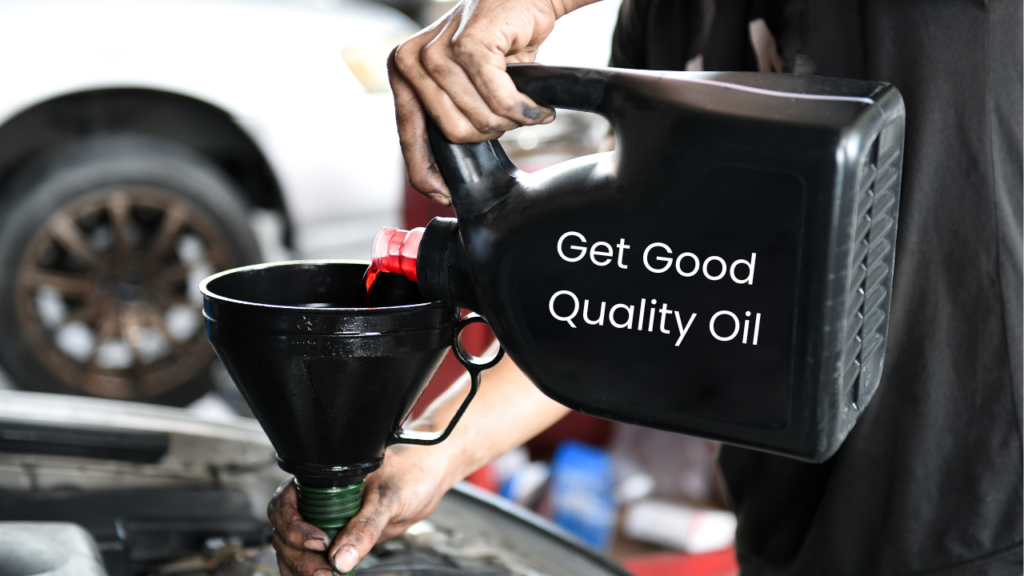
Add New Oil
With the drain plug securely reinstalled, you’re ready to replenish your engine with fresh oil.
Begin by locating the oil fill cap, typically marked with an oil-can symbol, and remove it. Place a funnel in the opening to prevent spills and guarantee accurate pouring.
Consult your owner’s manual to determine the correct oil type and capacity for your specific vehicle. Most engines require between 4 to 8 quarts of oil. Carefully pour the recommended amount into the engine, taking care not to overfill.
Once you’ve added the new oil, replace the oil fill cap tightly. Start the engine and let it idle for at least 30 seconds to allow the fresh oil to circulate throughout the system. This step is essential for proper lubrication of all engine components.
After running the engine, turn it off and wait a few minutes for the oil to settle. Then, check the oil level using the dipstick. Wipe the dipstick clean, reinsert it fully, and remove it again to get an accurate reading.
If necessary, add more oil to reach the ideal level indicated on the dipstick. Repeat this process until the oil level is correct.
Check Oil Level
Checking your oil level is an important step in maintaining your engine’s health and performance.
To perform this vital task, start by confirming your engine is off and has cooled for a few minutes to prevent burns.
Locate the dipstick, usually marked with a brightly colored handle, and follow these steps:
- Remove the dipstick and wipe it clean with a rag.
- Reinsert it fully, then pull it out again.
- Check the oil level against the ‘minimum’ and ‘maximum’ marks.
The oil level should fall between these marks. If it’s below the minimum, you’ll need to add oil. Consult your owner’s manual for the correct oil type and quantity.
Regularly checking your oil level, at least monthly or before long trips, can help detect leaks or excessive oil consumption, indicating potential engine issues.
To maintain peak engine health, make this check a routine part of your vehicle maintenance. If you’re unsure about the process, check your owner’s manual for specific instructions related to your vehicle model.
Start Engine and Inspect
After completing the oil change, you’ll need to start the engine and conduct a thorough inspection to guarantee everything’s functioning correctly.
Begin by starting the engine and letting it idle for at least 30 seconds. This allows the new oil to circulate throughout the engine, ensuring proper lubrication of all components.
As the engine runs, listen carefully for any unusual noises such as knocking or ticking. These sounds could indicate underlying engine issues that require attention.
Simultaneously, check your dashboard’s oil pressure light. If it remains illuminated after a few seconds, you may have low oil pressure, which demands immediate investigation.
Next, inspect the area beneath your vehicle for any signs of oil leaks, particularly around the oil filter and drain plug. Even small leaks can lead to significant problems if left unaddressed.
After running the engine for a few minutes, shut it off and wait briefly. Then, use the dipstick to check the oil level, ensuring it’s within the recommended range.
If it’s too low or high, adjust accordingly. This final check confirms that you’ve added the correct amount of oil, completing your oil change process successfully.
Proper Oil Disposal
Proper disposal of used oil is vital for environmental protection and resource conservation. After changing your car’s oil, you must handle the used oil responsibly to prevent environmental contamination.
Never pour used oil down drains or onto the ground, as it can severely pollute water sources. Instead, transfer the oil into a clean, sealable container for safe transport to a recycling facility.
Here are three important points to remember about proper oil disposal:
- One quart of used oil can contaminate up to 250,000 gallons of fresh water.
- Many auto parts stores and recycling centers accept used oil for free.
- Recycling used oil reduces the need for new oil production, lowering overall environmental impact.
To dispose of your used oil correctly, locate a nearby recycling center or auto parts store that accepts it. These facilities have the proper equipment to handle and recycle used oil safely.
When transporting the oil, make sure the container is securely sealed to prevent spills. By recycling your used oil, you’re not only protecting the environment but also contributing to resource conservation.
Record Maintenance Details
Meticulous record-keeping forms an integral part of your car’s oil change routine, guaranteeing you stay on top of maintenance schedules and track your vehicle’s health over time.
Create a detailed log of your oil changes, including the date, mileage, and specific oil type used. This practice helps you maintain a thorough maintenance history and facilitates timely future changes.
When you record maintenance details, don’t forget to note the manufacturer-recommended oil grade for your vehicle. This information is vital for easy reference during subsequent oil changes. Additionally, document the oil filter brand and part number to verify compatibility in future replacements.
As you perform oil changes, observe and record any notable characteristics of the old oil, such as color or consistency. These observations can provide valuable insights into your engine’s health over time.
To streamline your maintenance tasks, consider utilizing digital tools or apps designed for tracking oil changes and other vehicle upkeep. These platforms can send reminders based on mileage or time intervals, helping you stay proactive with your car’s maintenance schedule.
Frequently Asked Questions
What Are the 5 Steps to an Oil Change?
To freshen your vehicle’s lifeblood: 1) Raise your chariot. 2) Drain the old elixir. 3) Replace the guardian filter. 4) Replenish with new essence. 5) Confirm levels and circulation. You’ll guarantee your engine’s health with these precise, technical steps.
What Are the 3 Steps to Changing Your Oil?
To change your oil, you’ll follow these three main steps:
- Drain the old oil by removing the drain plug.
- Replace the oil filter with a new one.
- Add fresh oil to the engine and check levels.
What to Do Before Changing Engine Oil?
Did you know 27% of car owners change their own oil? Before changing engine oil, park on a level surface, engage the parking brake, and let the engine cool for an hour. Gather tools, wear safety gear, and remove the dipstick.
What Do I Need When Changing Car Oil?
You’ll need a ratchet set, oil filter wrench, catch pan, new oil filter, correct engine oil, funnel, gloves, and goggles. Don’t forget rags for cleanup. Gather all materials beforehand to guarantee a smooth, efficient oil change process.